|
Everything is clean, you have all of the parts you needed, and
your playfield is ready. Before I start re-assembly I clean
the work area very well and throw any garbage away. Install
the playfield in the rotisserie or machine. I install the posts
first. They are usually bolted in and I find it easier to install
them with nothing else on the playfield. I then install the
pop-bumper assemblies and other solenoid assemblies.
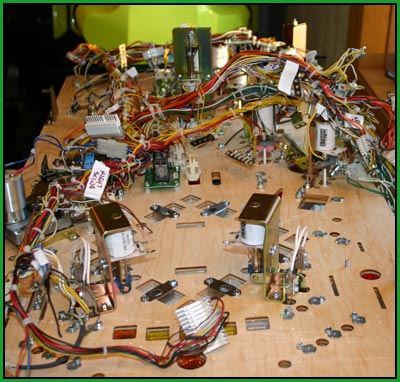
Next is the wiring harness. I generally start by fastening
the harness at the rear of the playfield. I then separate
the “veins” of the harness and place them in their
approximate areas. One thing to keep in mind is that wires
have a “memory.” The wires will naturally be in
the vicinity of where they should be and I don’t even
have to refer to my pictures for most of it. When I complete
an area I do look at my pictures to see if I placed everything
properly. I fasten all of the lamps first. When I fasten the
switches I test them all with my Fluke meter on the continuity
setting. When a switch is open you should hear no sound. When
you close it you should hear the sound immediately as you
close it and it should not stutter. If it does, replace the
switch. I have found that the switches survive the cleaning
process remarkably well. I usually end up replacing two or
three switches that are marginal. Once you have tested the
switch, screw it down.
Now you should re-soldering all of the coils. I use my digital
soldering station and a solder sucker. I remove all of the
residual solder and stray wire from the coil's terminals.
Then I re-cut the wires and wrap them around the terminals
trying not to remove too much wire. I refer to my photos to
double check and make sure the polarity is correct.
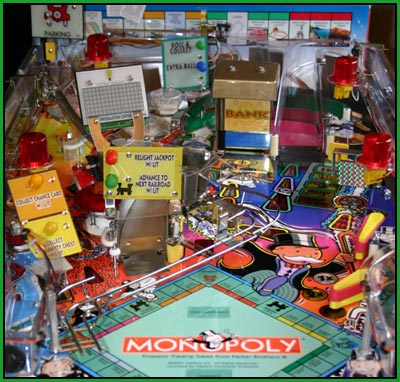
Next install the rest of the goodies. I take my time while
doing this to try and make sure everything is in the right
spot and tweaked for good playability. Once everything is
re-installed I do another underside check to make sure everything
is hooked up.
The last step is re-installing the playfield in your cabinet
and hooking the wires to the driver and cpu boards. If you
decide not to do a cabinet restoration at least make sure
you clean the cabinet thoroughly using a vacuum and/or a compressor.
You have a very clean playfield; residual dirt in the cabinet
is bad. Double check your back box connections and make sure
the transformer is hooked up properly.
The first time I turn the game on be very tentative for popping
noises, burning smells, or small fires =D If any of these
things happens, quickly shut the machine down. Assuming nothing
catastrophic happened, go into diagnostics and check each
lamp, each solenoid, and all toys. I usually put a lamp or
two in the wrong spot and it’s easy to switch them.
Once you have verified everything is working, install new
balls and play a few games. Watch to make sure the game is
doing what it’s supposed to be doing. I have been lucky
my last 3 restoration and only had a few minor glitches to
fix.
NEXT
|